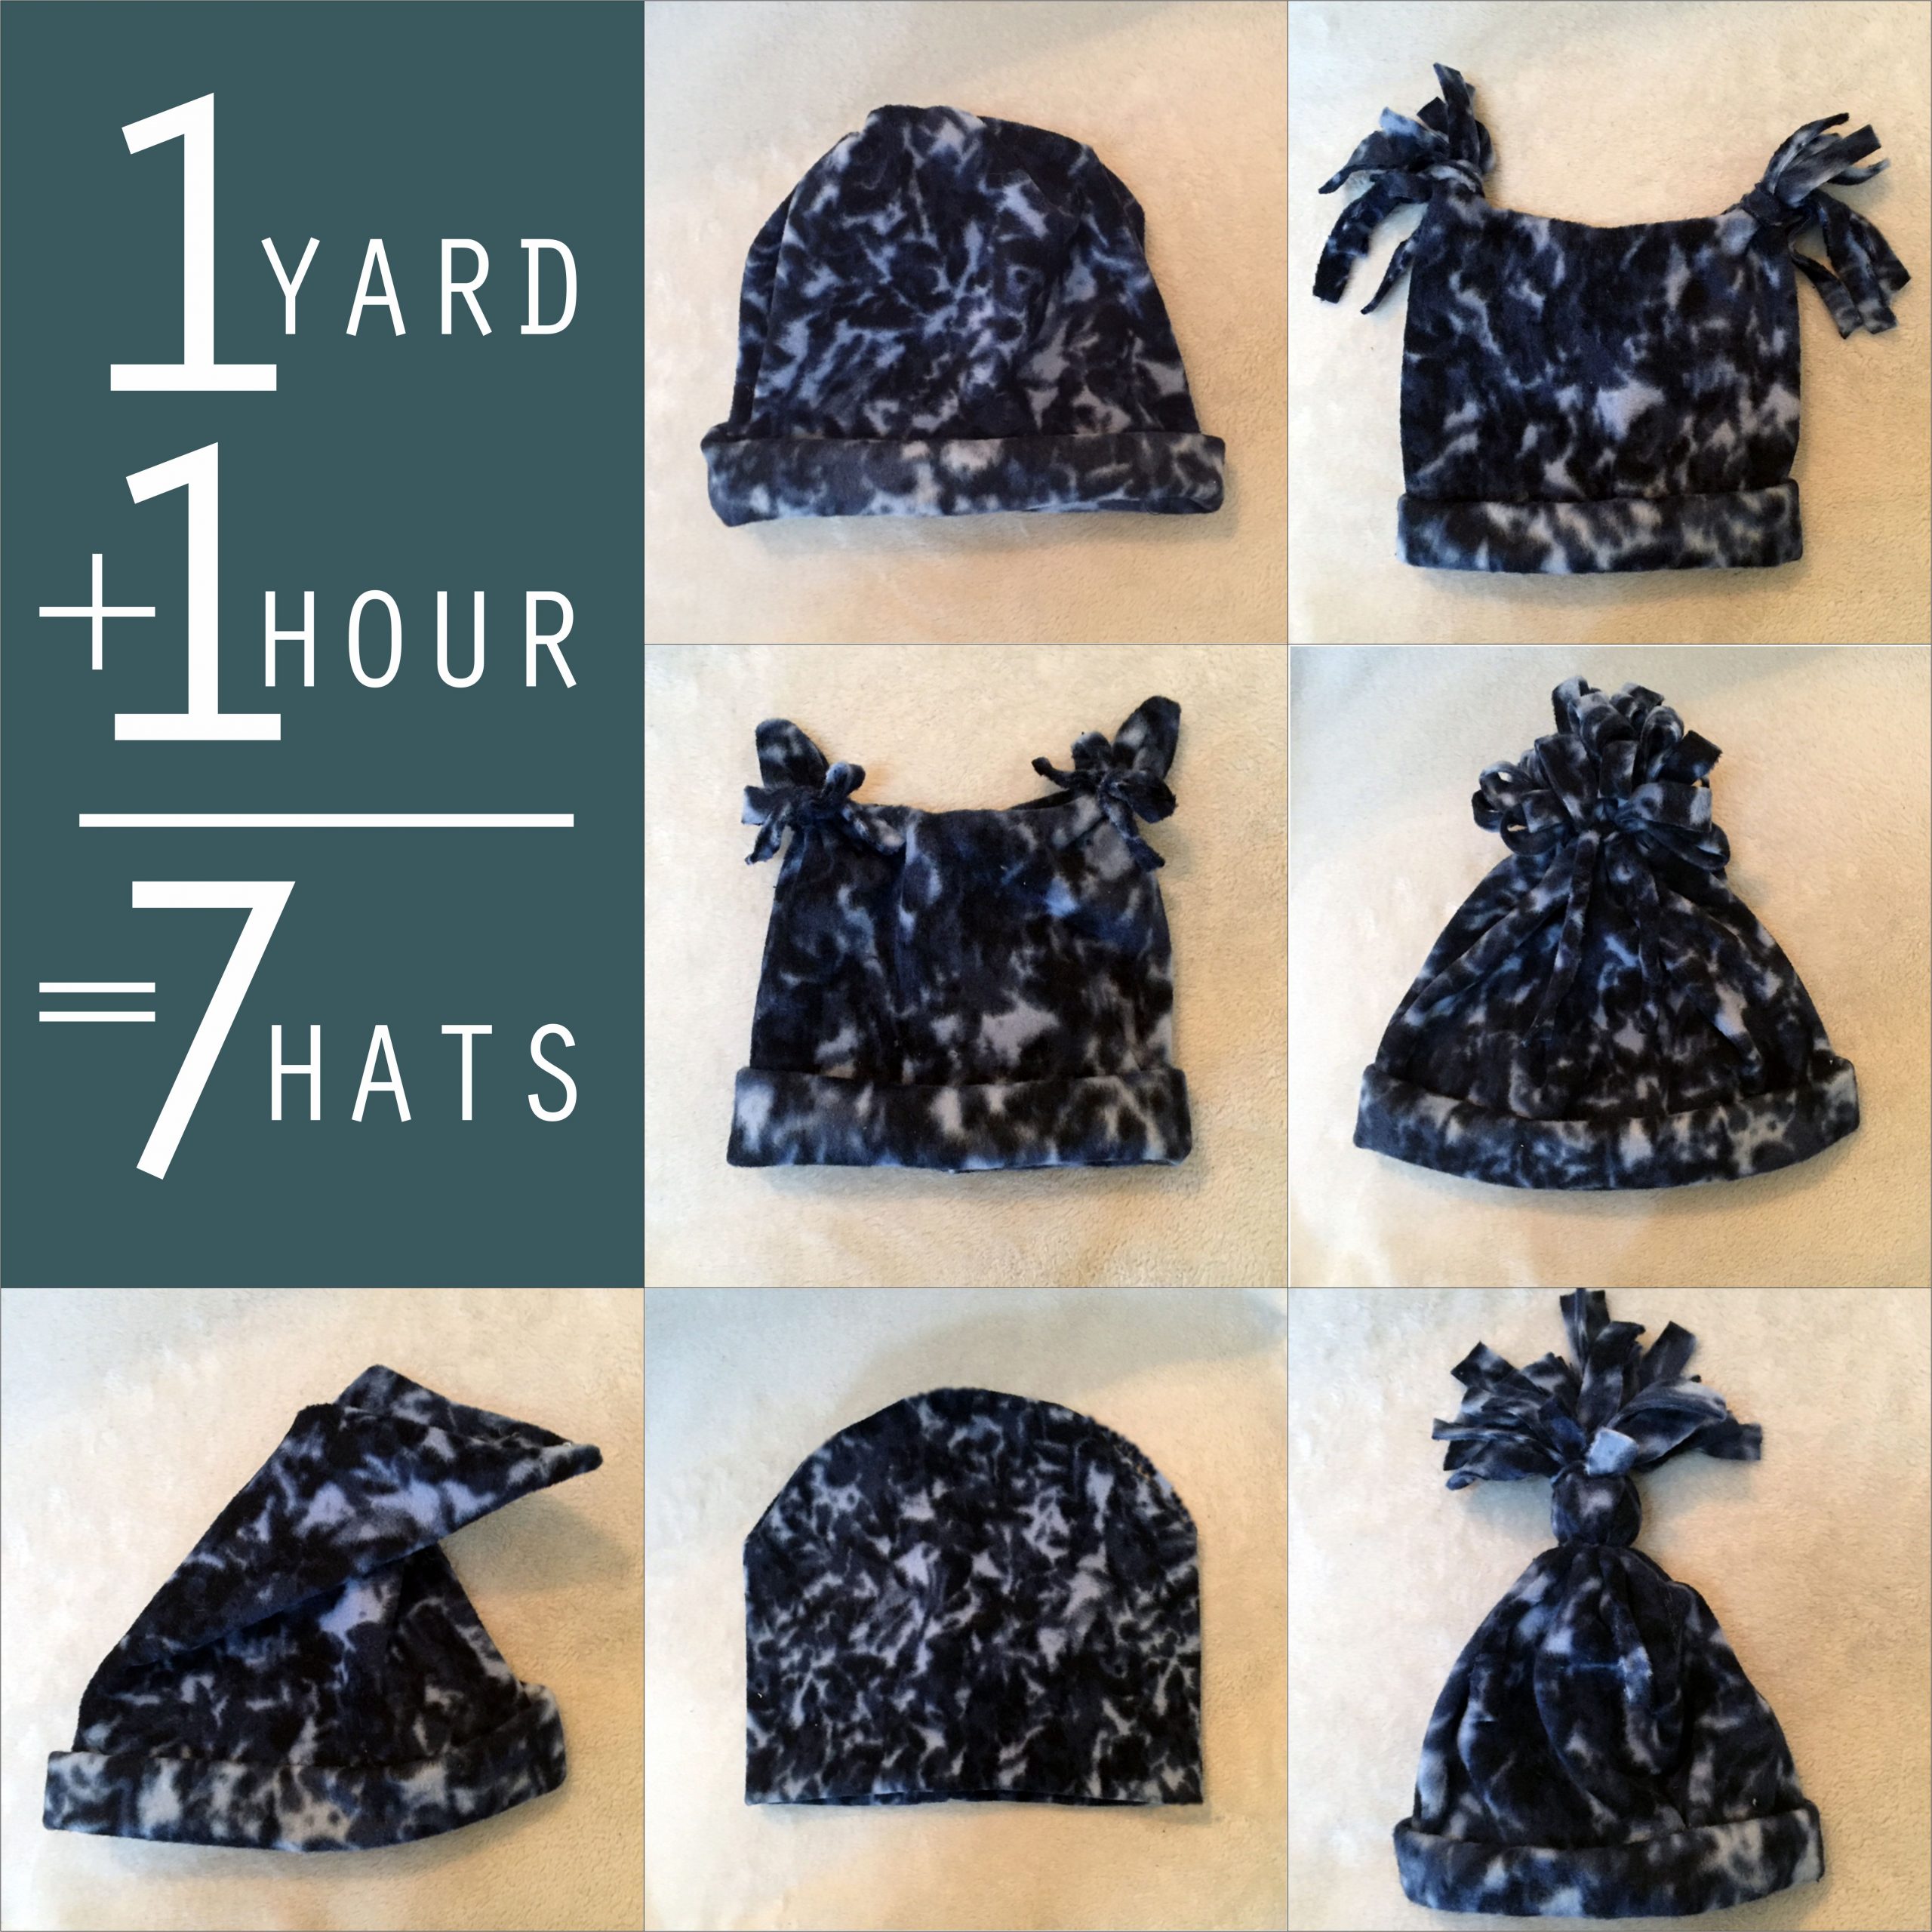
When making fleece hats or other items for charity you want to make sure you are giving a quality item you would want yourself.
But that doesn’t mean you have to spend a lot of money or time if you plan your project properly and we’ve done the planning. You really can make seven hats with one yard of 60″ fleece and if you have some experience in sewing they can be made in about one hour.
What our Video or Follow the Directions Below.
Supplies
- 1 Yard of 60” Fleece To Make 7 Hats
- Sewing Machine and Thread
- Fabric Scissors & Ruler or Rotary Cutter
- Erasable Fabric Marking Pen
When choosing fleece, pick a color or print that works for all men, woman, boys or girls unless you know who the recipients will be.
Don’t forget your 40% off coupon when you go shopping!

Instructions for Cutting the Fabric
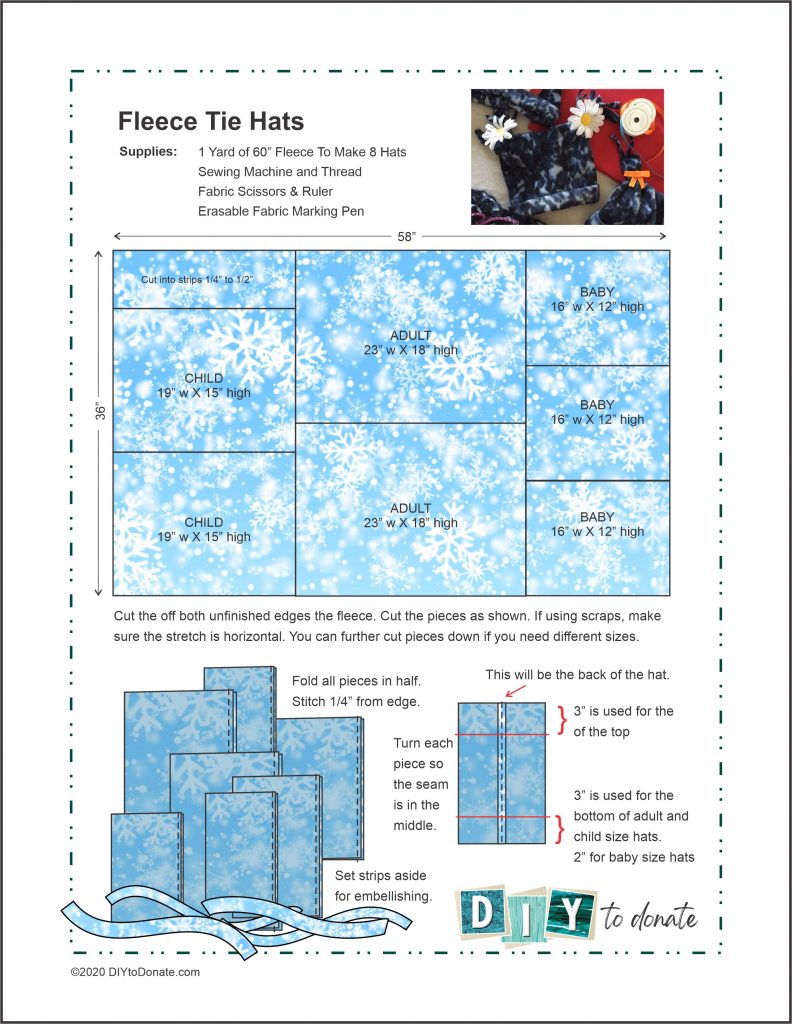
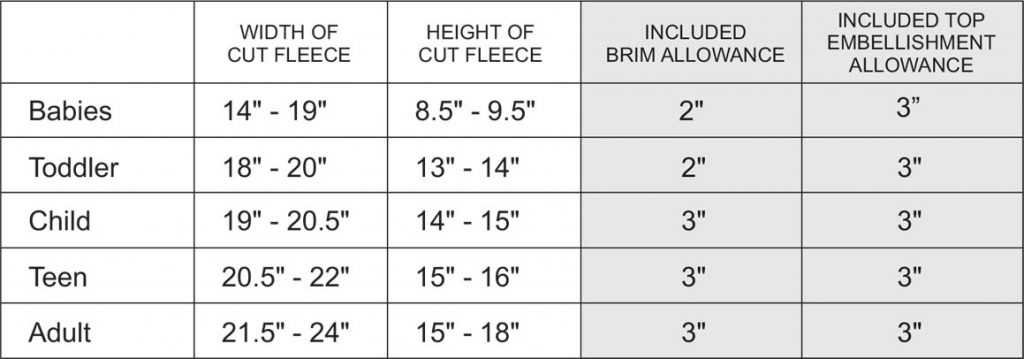
Cut off both unfinished edges of the fleece. Cut the pieces as shown. If using scraps, make sure the stretch is horizontal. You can further cut pieces down if you need different sizes.
All the hat styles start out with the same method then you choose how you want to finish them. Change it up or make them all the same.
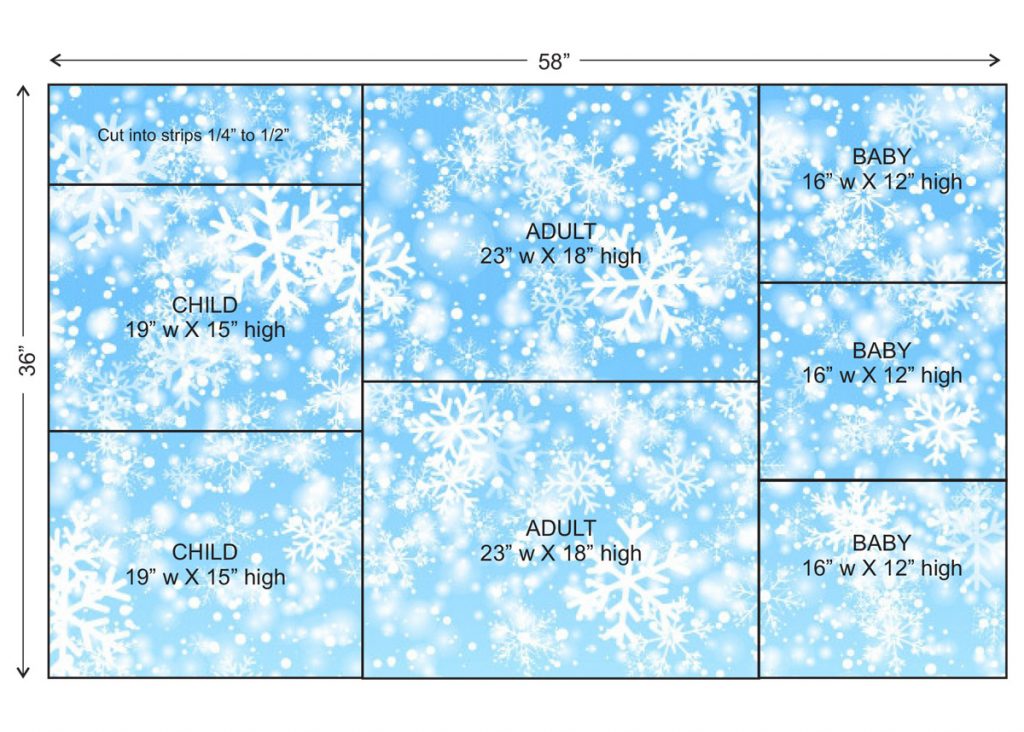
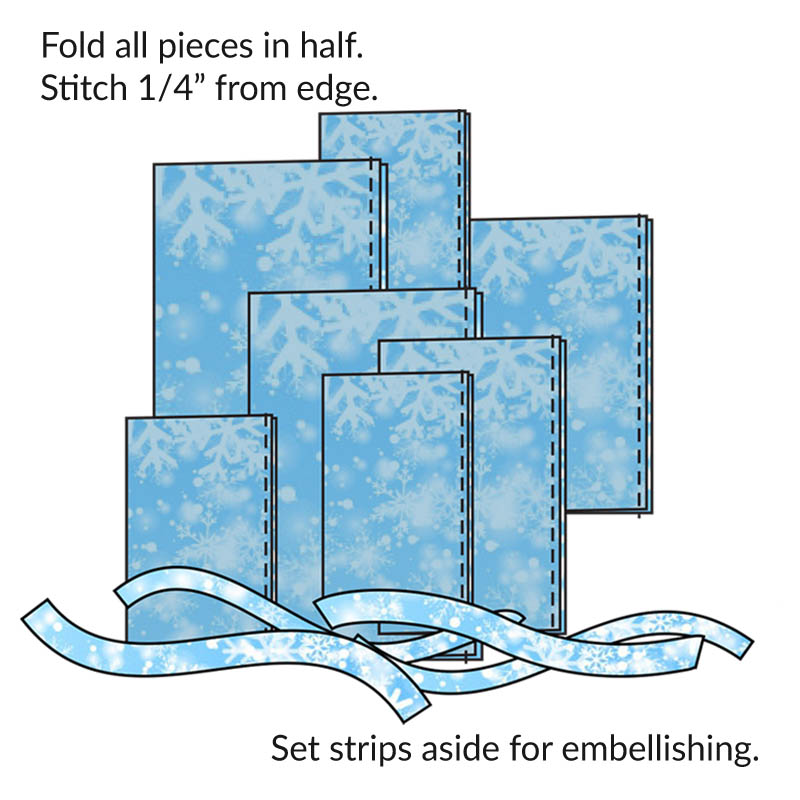
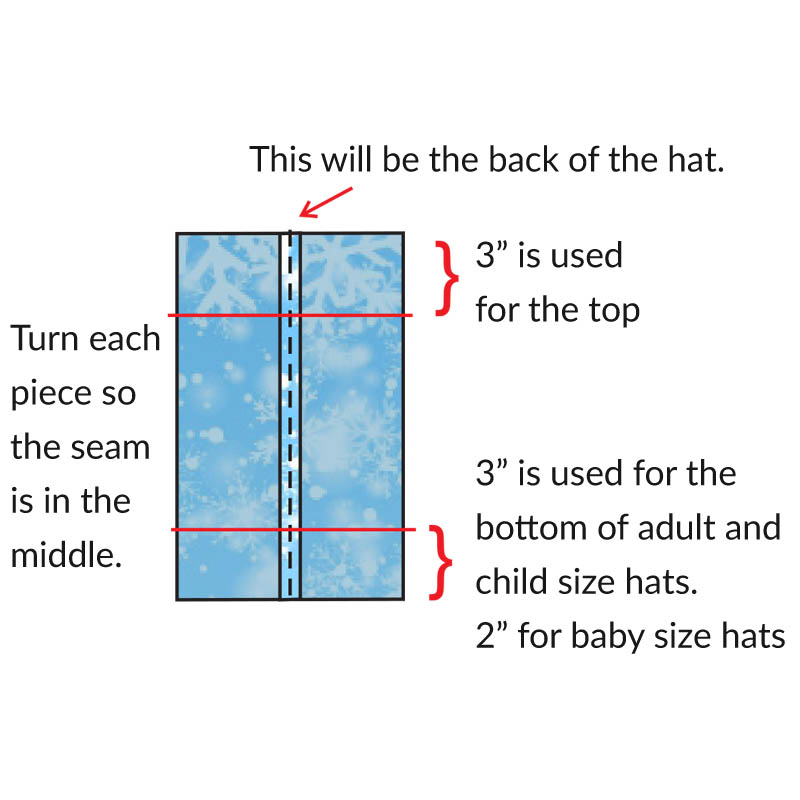
The sizes cut are for babies, children and adults. You can cut down pieces for toddlers and teens, using this chart as a guide.
Easy Peasy Fleece Hat
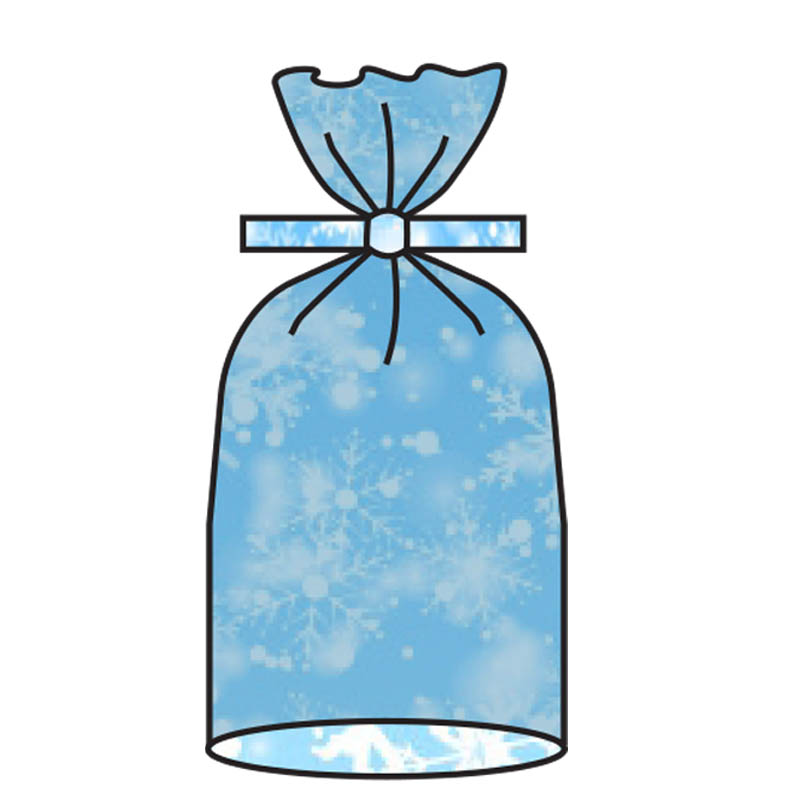
1. Use a cut piece of scrap to tie the top together securely with a double knot.
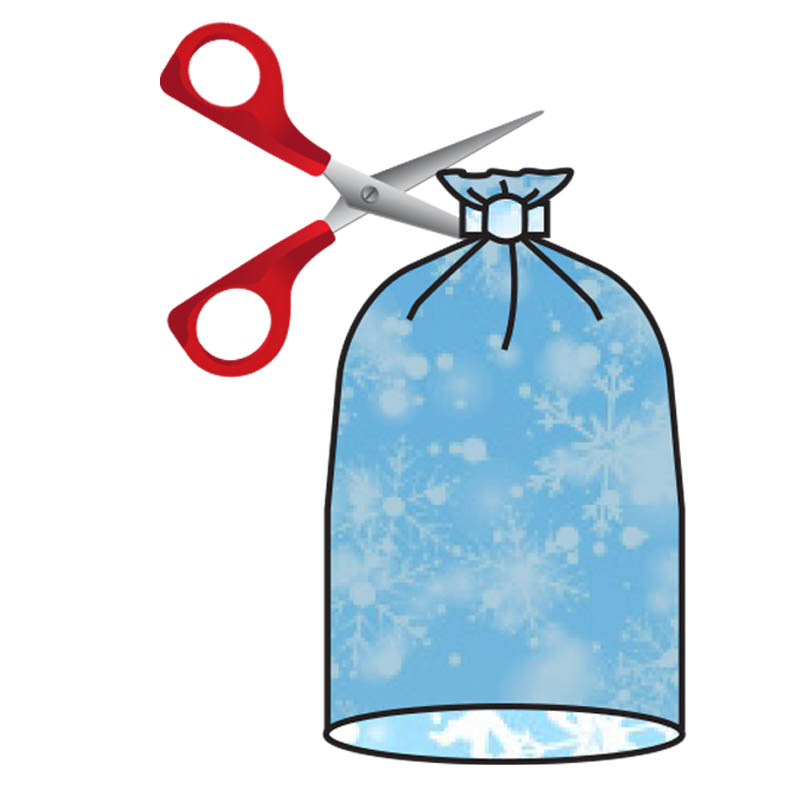
2. Cut the top off near the knot. Snip the tie ends.
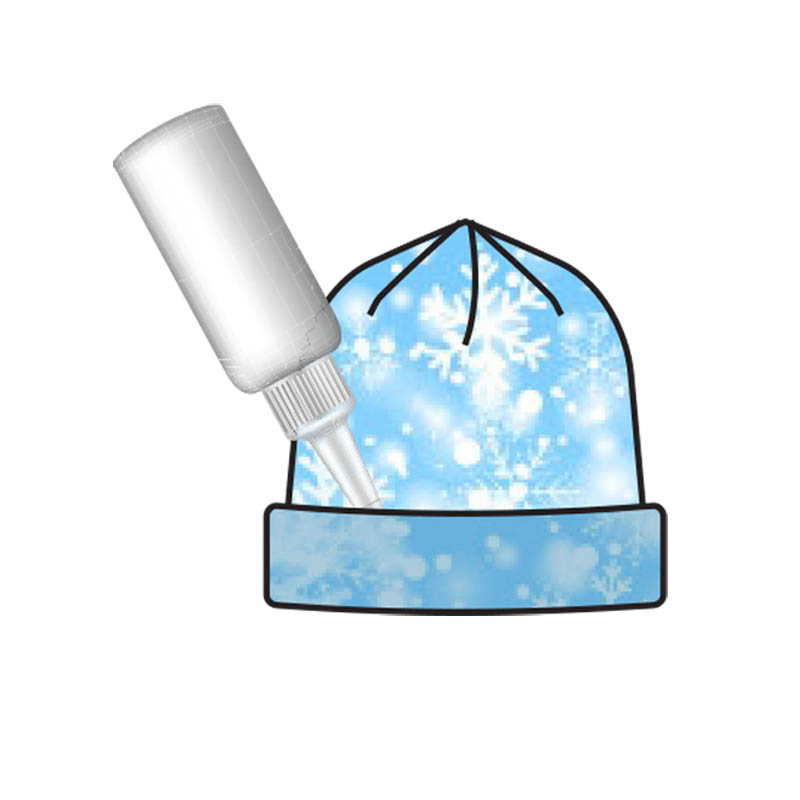
3. Turn right side out. Fold brim up two times, tacking with fabric glue.
Elf Hat
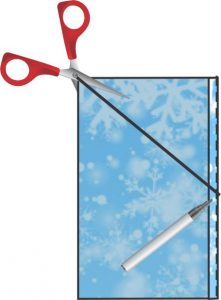
1. Use marker to draw a line from the top corner to the seamed edge about halfway down.
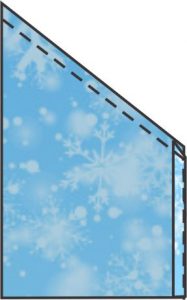
2. Stitch near the diagonal cut. Turn right side out.
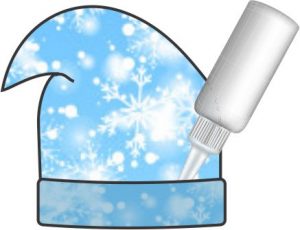
3. Fold brim up two times tacking with fabric glue.
Slouchie Beanie
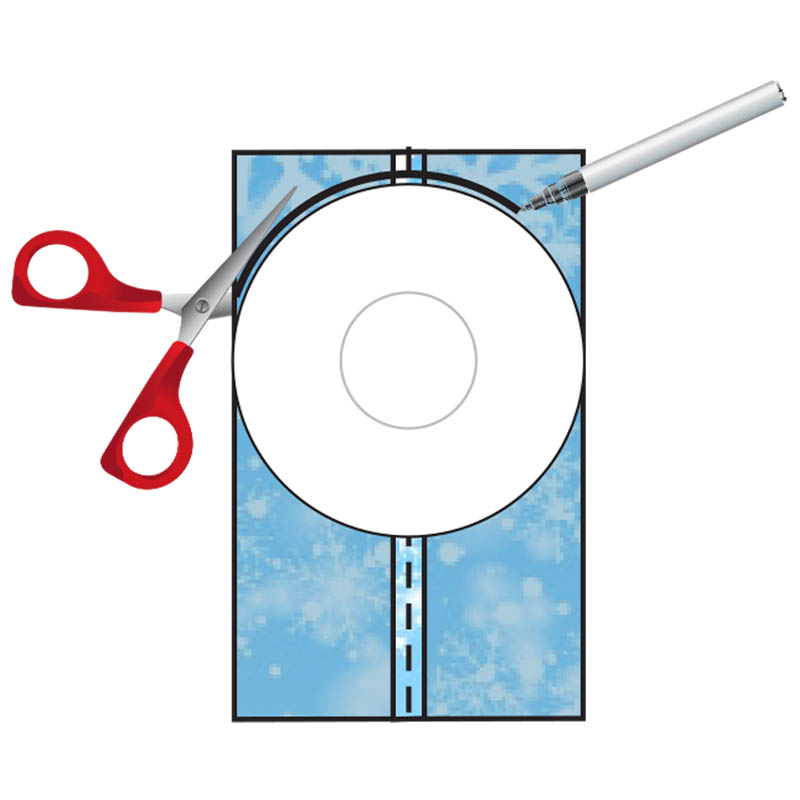
1. Use marker to trace around a plate at the top of the hat. Cut on line.
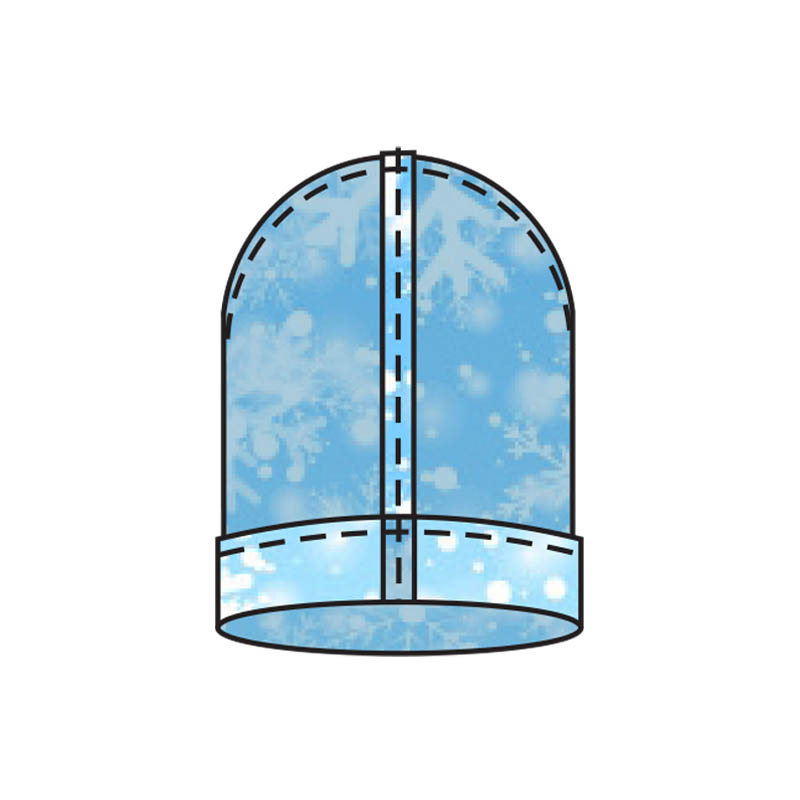
2. Stitch near cut curve. Fold the brim up 1.25″. Stitch all around 1″ form edge.
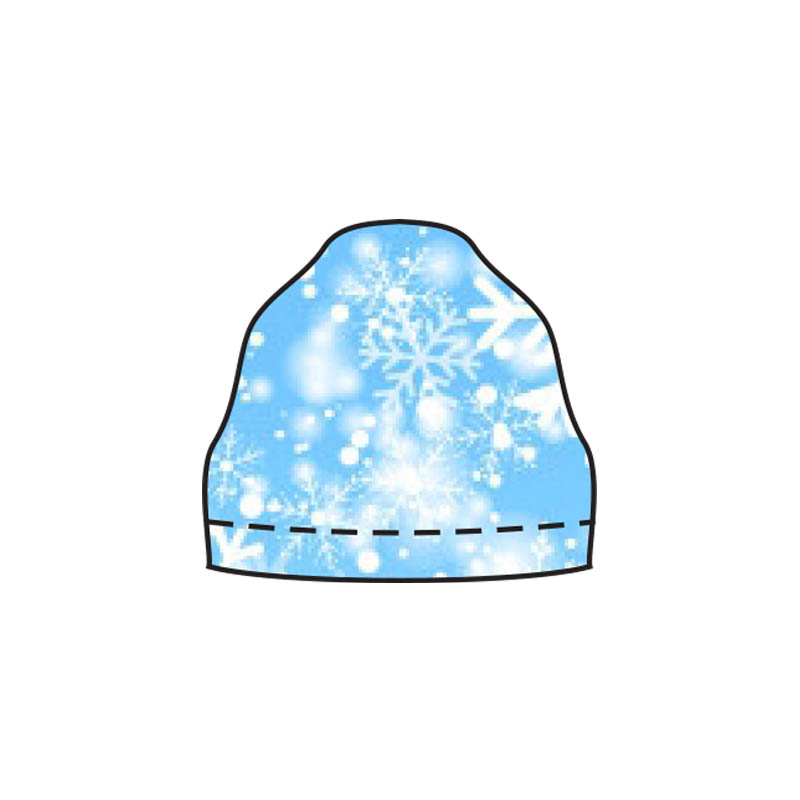
3. Turn right side out.
Pigtail Hat
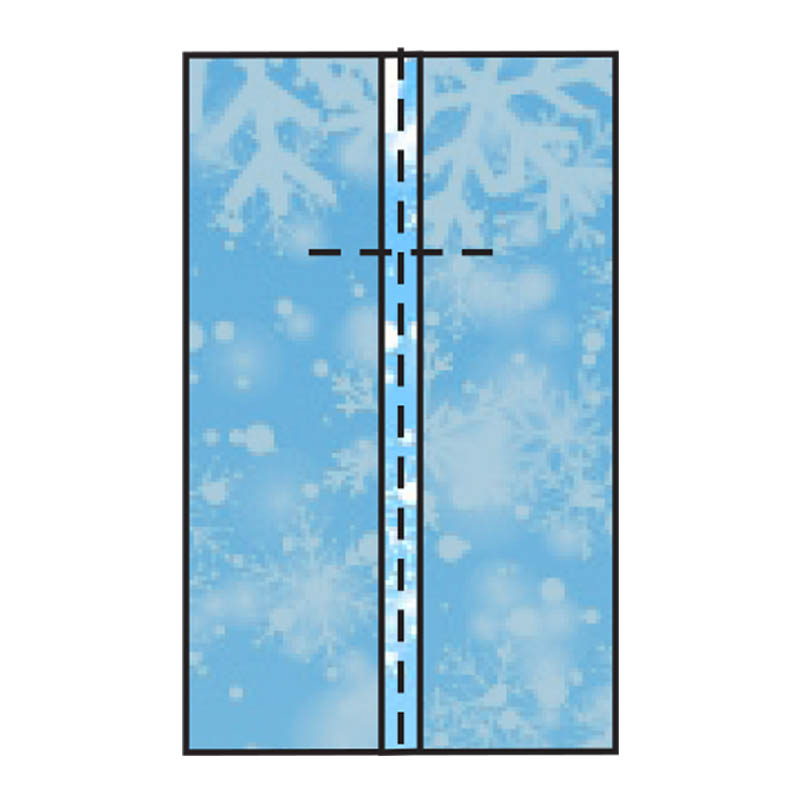
1. Stitch across top 3″ from edge, leaving 2″ unstitched from each edge
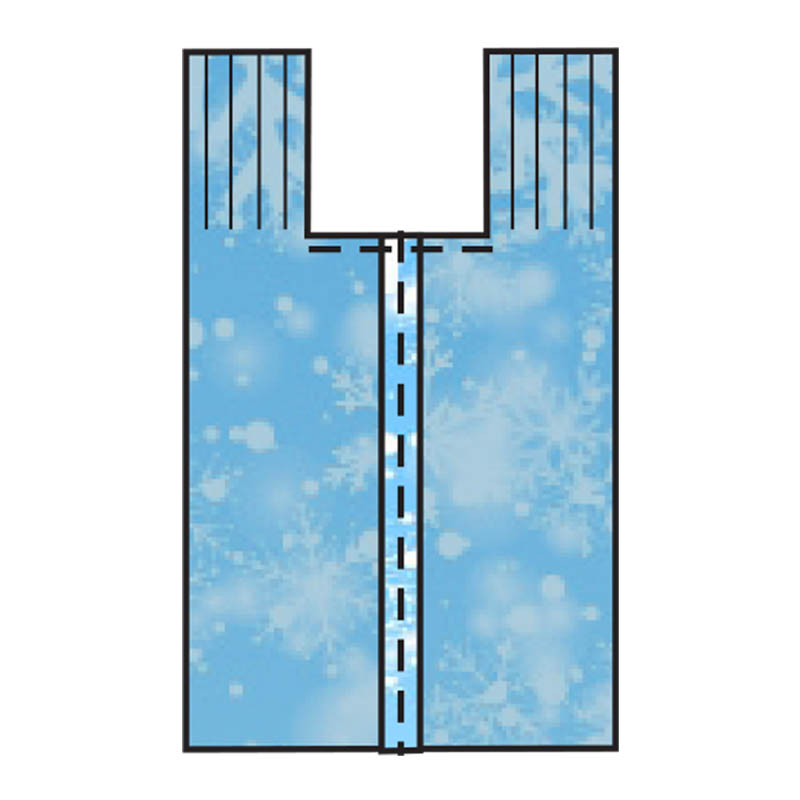
2. Cut down near the top stitching. Cut slits every 1/4″ at both ends. Turn right side out
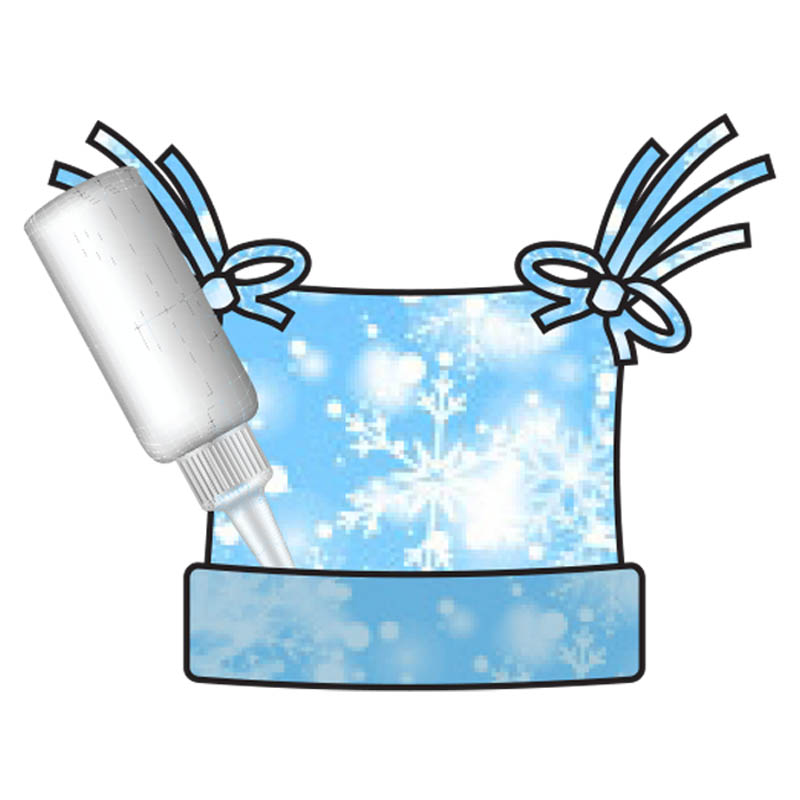
3. Bunch the fringes at each corner and tie a scrap piece around both bunches. Fold brim up two times, tacking with fabric glue
Pineapple Hat
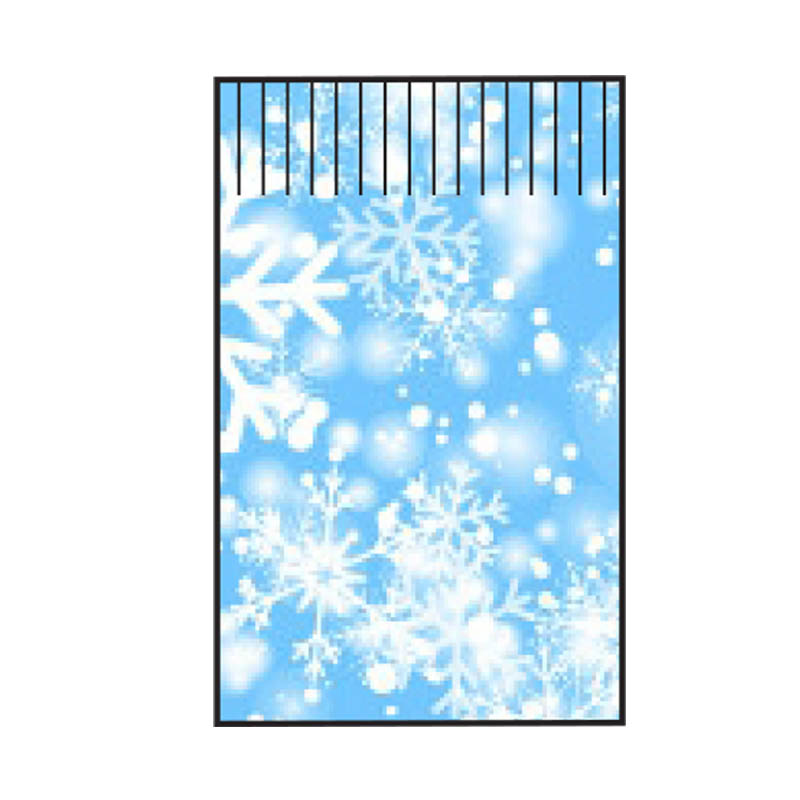
1. Turn right side out. Cut down 3″ from the top, making slits approximately every 3/8″.

2. Bunch the fringe together at the top and tie a scrap piece around both bunches.
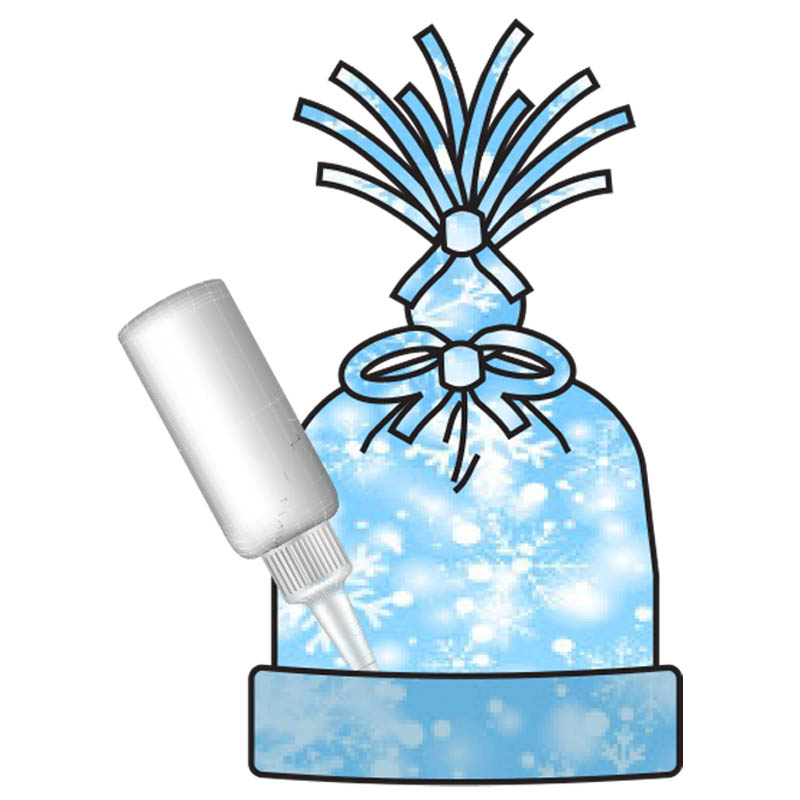
3. Bunch the hat under the knot and tie another scrap piece around it. Fold brim up two times, tacking with fabric glue.
Hat with Ears
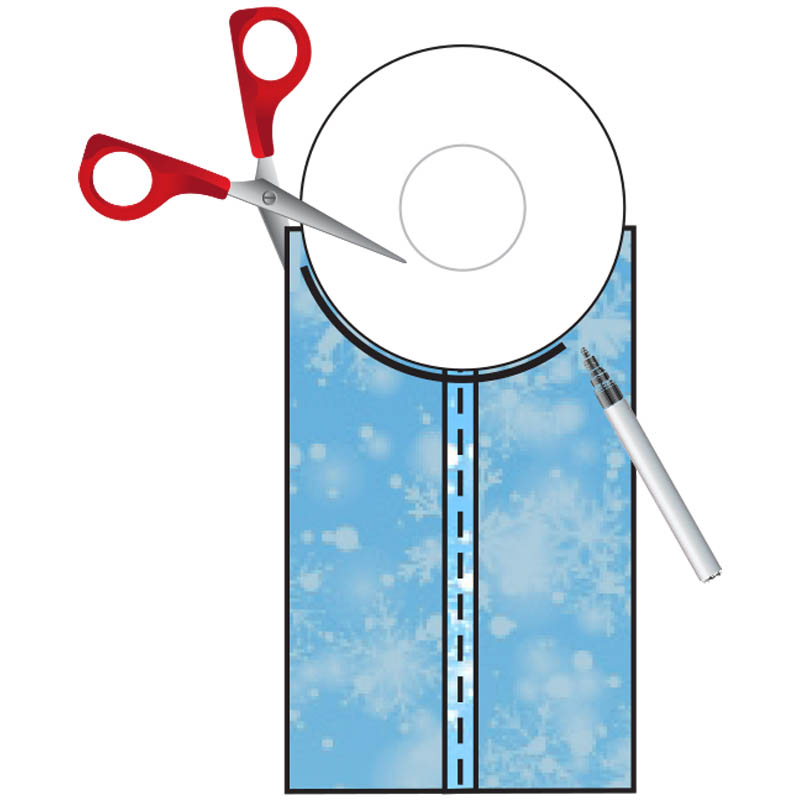
1. Use marker to trace around a plate at the top of the hat. Cut on line
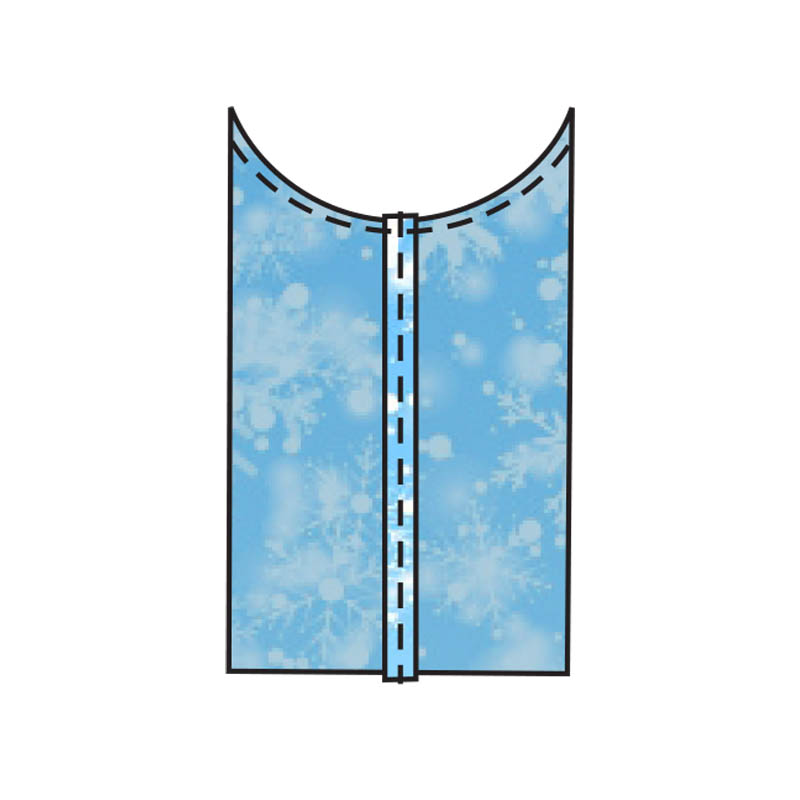
2. Stitch near cut curve. Turn right side out.
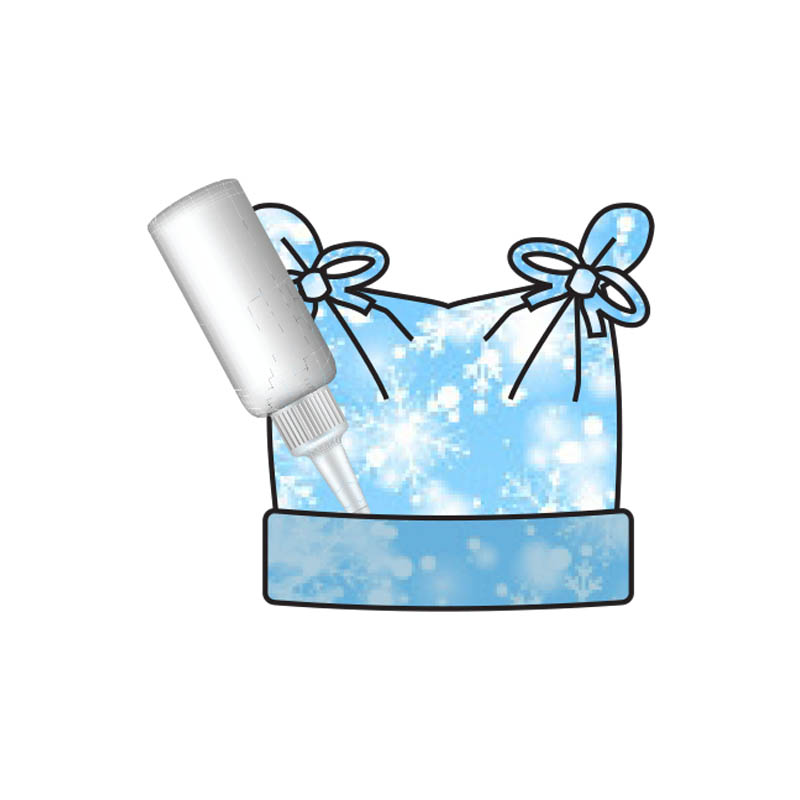
3. Bunch each top corner and tie a scrap piece around both bunches. Fold brim up two times, tacking with glue.
Flower Top Hat
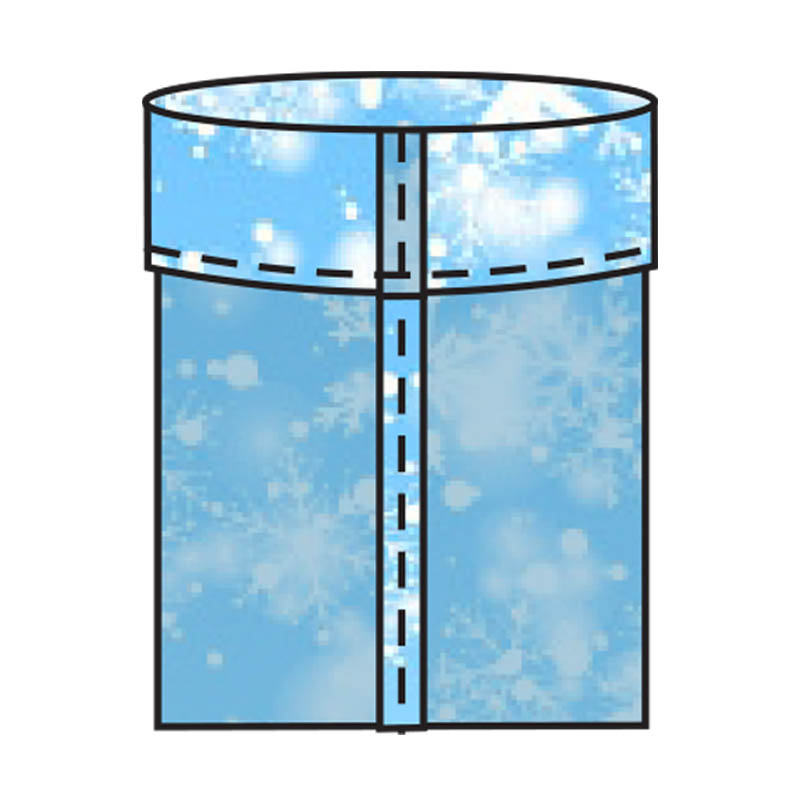
1. Fold top down 3″. Stitch close to edge.
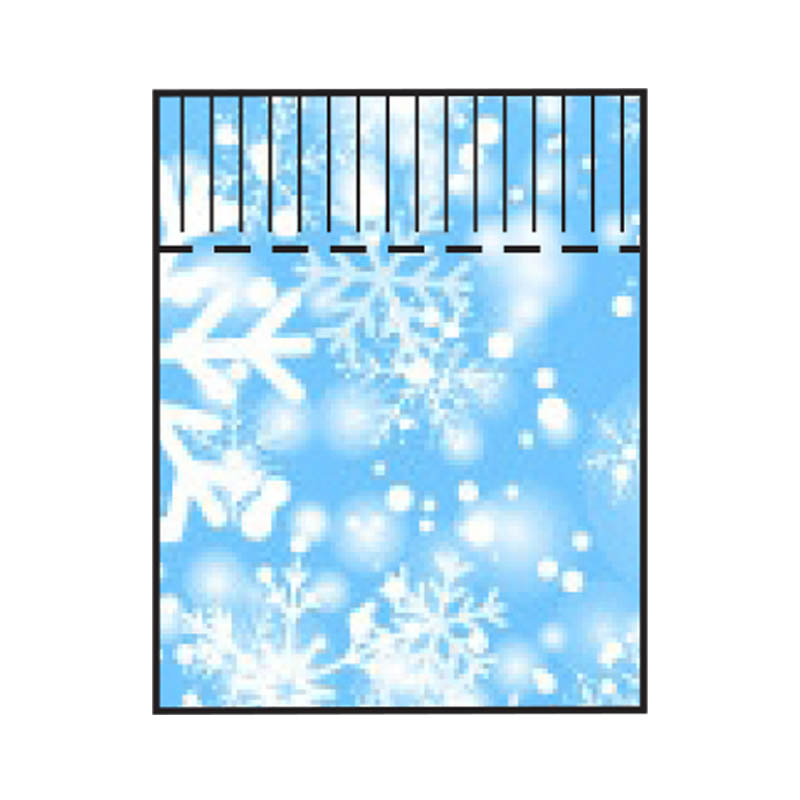
2. Turn right side out. Cut slits down to the stitching line.
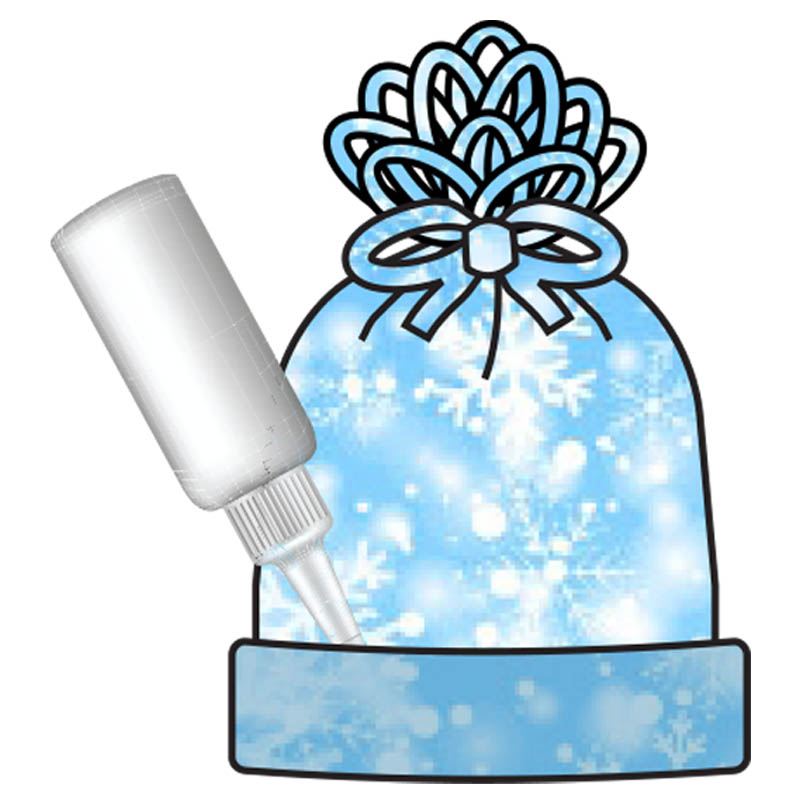
3. Bunch the top together and tie a scrap piece around it. Fold brim up two times, tacking with fabric glue.
Finishing Touches for Your Fleece Hats
Now would be a good a good time to dig into your craft stash for some little extra embellishment. Add some bows or ribbon. Use fabric glue to attach a flower or some gems.
Watch our video for ideas for embelling.
Download our free printable to take to your meeting or give to friends who want to help.
Where to Donate Your Fleece Hats
The following organizations focus their efforts during the holiday season. Make sure to get your hats to them early enough for distribution.
Hatsgiving.org providing soft, warm hats for children and adults who have lost their hair while battling cancer.
What you can make to donate:
- Fleece Hats
- Knit Hats
- Crocheted Hats
- Loom Hats
Hats for the Homeless collects hats, scarves and gloves for the homeless in New York City.
What you can make to donate:
- Fleece Hats
- Knit Hats
- Crocheted Hats
- Gloves


